Ori And The Will Of The Wisps Shriek guide
This is it: the final boss guide for Ori And The Will Of The Wisps. You can watch the video above for the full Shriek boss fight, or read on for word-based tips for how to defeat her. There’s no real weapon or skill recommendation here as you’ll likely have tons of health and energy to use up. I would say that the ability “launch” is mandatory for two sections of this fight, so keep that one in your current build. Contents
Shriek first phase How to complete the chase sequence Shriek second phase Shriek third phase
Shriek first phase
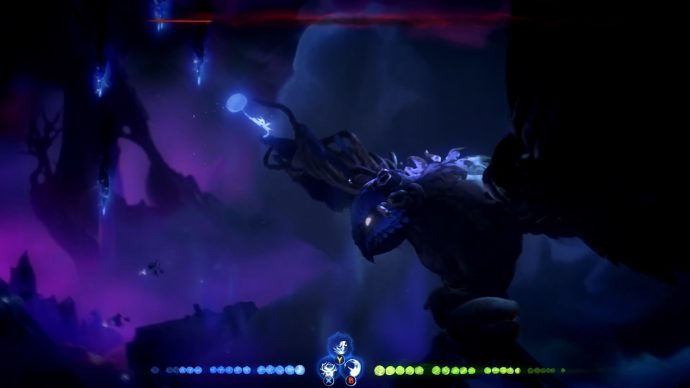
The first phase of this boss battle isn’t too difficult compared to what’s to come. She has a variety of attacks but they’re all easily avoided for the most part. This is what Shriek can do:
She will slam her peg legs down twice, causing a shockwave each time. She will then slam herself down the first time, giving you a chance to hit her. She will normally repeat the shockwaves after the first set, but this time she flies off to either come back down with force, or hover in the air for a pit to fire projectiles. When Shriek takes to the skies, look for an area that lights up. This is where Shriek lands, so don’t be where that highlighted area is. When Shriek screams at ground level, I actually found it best just to take the hit. It’s by far her weakest attack, it only hits once, and you can get some valuable hits in. If Shriek hovers overhead, she’ll send out a spread shot of projectiles, sometimes more than one volley at a time. Use bash to launch them back at her to deal some damage.
Eventually, Shriek will fly around the tree and strike the ground hard. Everything is disintegrating, so it’s time to run.
How to complete the chase sequence
One thing to keep in mind as everything is crumbling beneath Ori’s feet is that you have to equip the launch skill. For this section, it’s mandatory to make a lot of the gaps that appear that you need to jump across. If it’s not equipped, get it on Ori right now. Here are the steps you need to take to get across. Shriek will constantly try to attack you but don’t worry if she hits. It does a very small amount of damage. Just keep going until you reach the end.
Shriek second phase
Having chased you down, Shriek decides to get on the offensive once more. She’ll lose her peg-leg attack, but gain a bunch more of them that are devastating in their own right. Here are all of the new attacks:
When she flies into the background, Shriek will scream causing a rain of projectiles to appear overhead. The blue ones have a fixed trajectory, but the purple ones are homing attacks. Dodge to avoid all of them, bashing any that come too close. This time, when she hovers in the middle of the screen, she’ll fire a laser from her mouth. Dash to the other side, then use the launch ability to throw yourself into the sky. You can use this as an opportunity to hit her face. When she flies away and her silhouette flies across the screen, look for where the black clouds form. If they’re above you angled diagonally, jump and dash to the side to avoid a very fast flying Shriek. If the cloud forms at ground level, use the launch ability to throw yourself skywards to avoid this attack. If she flies towards you from the background, double jump to avoid.
Damage boosting from the scream attack at ground level still gives you a good opportunity to dish out a lot of damage, so I highly recommend that. You can always regenerate if you need to. You’ll know you’re in the last phase of the fight when the health bar briefly disappears.
Shriek third phase
By far, this is the most difficult part of the boss fight and it’s purely because there’s no solid ground. Shriek will begin raining projectiles that will now never end, before slamming herself into the ground to destroy the platforms. You will need to heal before the platforms are destroyed, so do so as she’s screaming in the background. You’ll need to balance using the bash ability to flit around like a persistent flying bug dodging a butterfly net. Aside from this, she’ll just dart around with the areas she comes from getting darker before she attacks. If you ever drop into the pit below, you’ll need to restart from just before Shriek flies into the background at the beginning of this phase. She’ll mostly settle on the right side of the screen when catching her breath, leaving you an opportunity to get some hits in. With enough hits, she’ll be sent crashing back down to earth and you will be victorious.
Ori And The Will Of The Wisps guides series
Congratulations, you have defeated the final boss and completed the game. Now, if you want to fully complete the game and get all the collectables, we have more guides readily prepared below that cover the locations of life and energy cell fragments, Gorlek Ores, and every other collectable found in Ori And The Will Of The Wisps.
Ori And The Will Of The Wisps guide - Our hub area for all of our guides for Ori And The Will Of The Wisps. Ori And The Will Of The Wisps Gorlek Ore locations - Every location of the Gorlek Ore locations to rebuild the village. Ori And The Will Of The Wisps life cell fragment locations - Every location of the life cell fragments to increase your health. Ori And The Will Of The Wisps energy cell fragment locations - All the places you can find energy cell fragments to raise your energy bar. Ori And The Will Of The Wisps Spirit Shard locations - Places to find all the Spirit Shards in the game. Ori And The Will Of The Wisps map locations - All of Lupo’s locations in the game. Ori And The Will Of The Wisps quests - Every side-quest detailed from where to begin, the item you need, and the rewards you get for completing them. Ori And The Will Of The Wisps Regrowing The Glades - Find all the seeds and replant them. Ori And The Will Of The Wisps boss guide - Our central bosses guides hub will walk you through each of the bosses, with some general top tips for fighting them.
Ori And The Will Of The Wisps bosses
Howl boss fight - How to defeat the Wolf boss. Horn Beetle boss fight - Learn how to squish the giant charging bug. Wellspring chase - Evade the mass of tentacles in this challenging chase sequence. Feeding Grounds stealth section - Steps to avoid the big owl’s clutches. Mora boss fight - Defeat the giant spider. Baur’s Reach avalanche chase - How to not get crushed beneath a torrent of snow. Kwolok boss fight - Make that frog come to his senses. Sand Worm chase - Escape the crumbling ruins and the Sand Worms mandibles. Willow Stone - How to shatter this mini-boss with ease.